
| Home | Products | Overview | Blog | Software | Applications | Contact | View Cart |
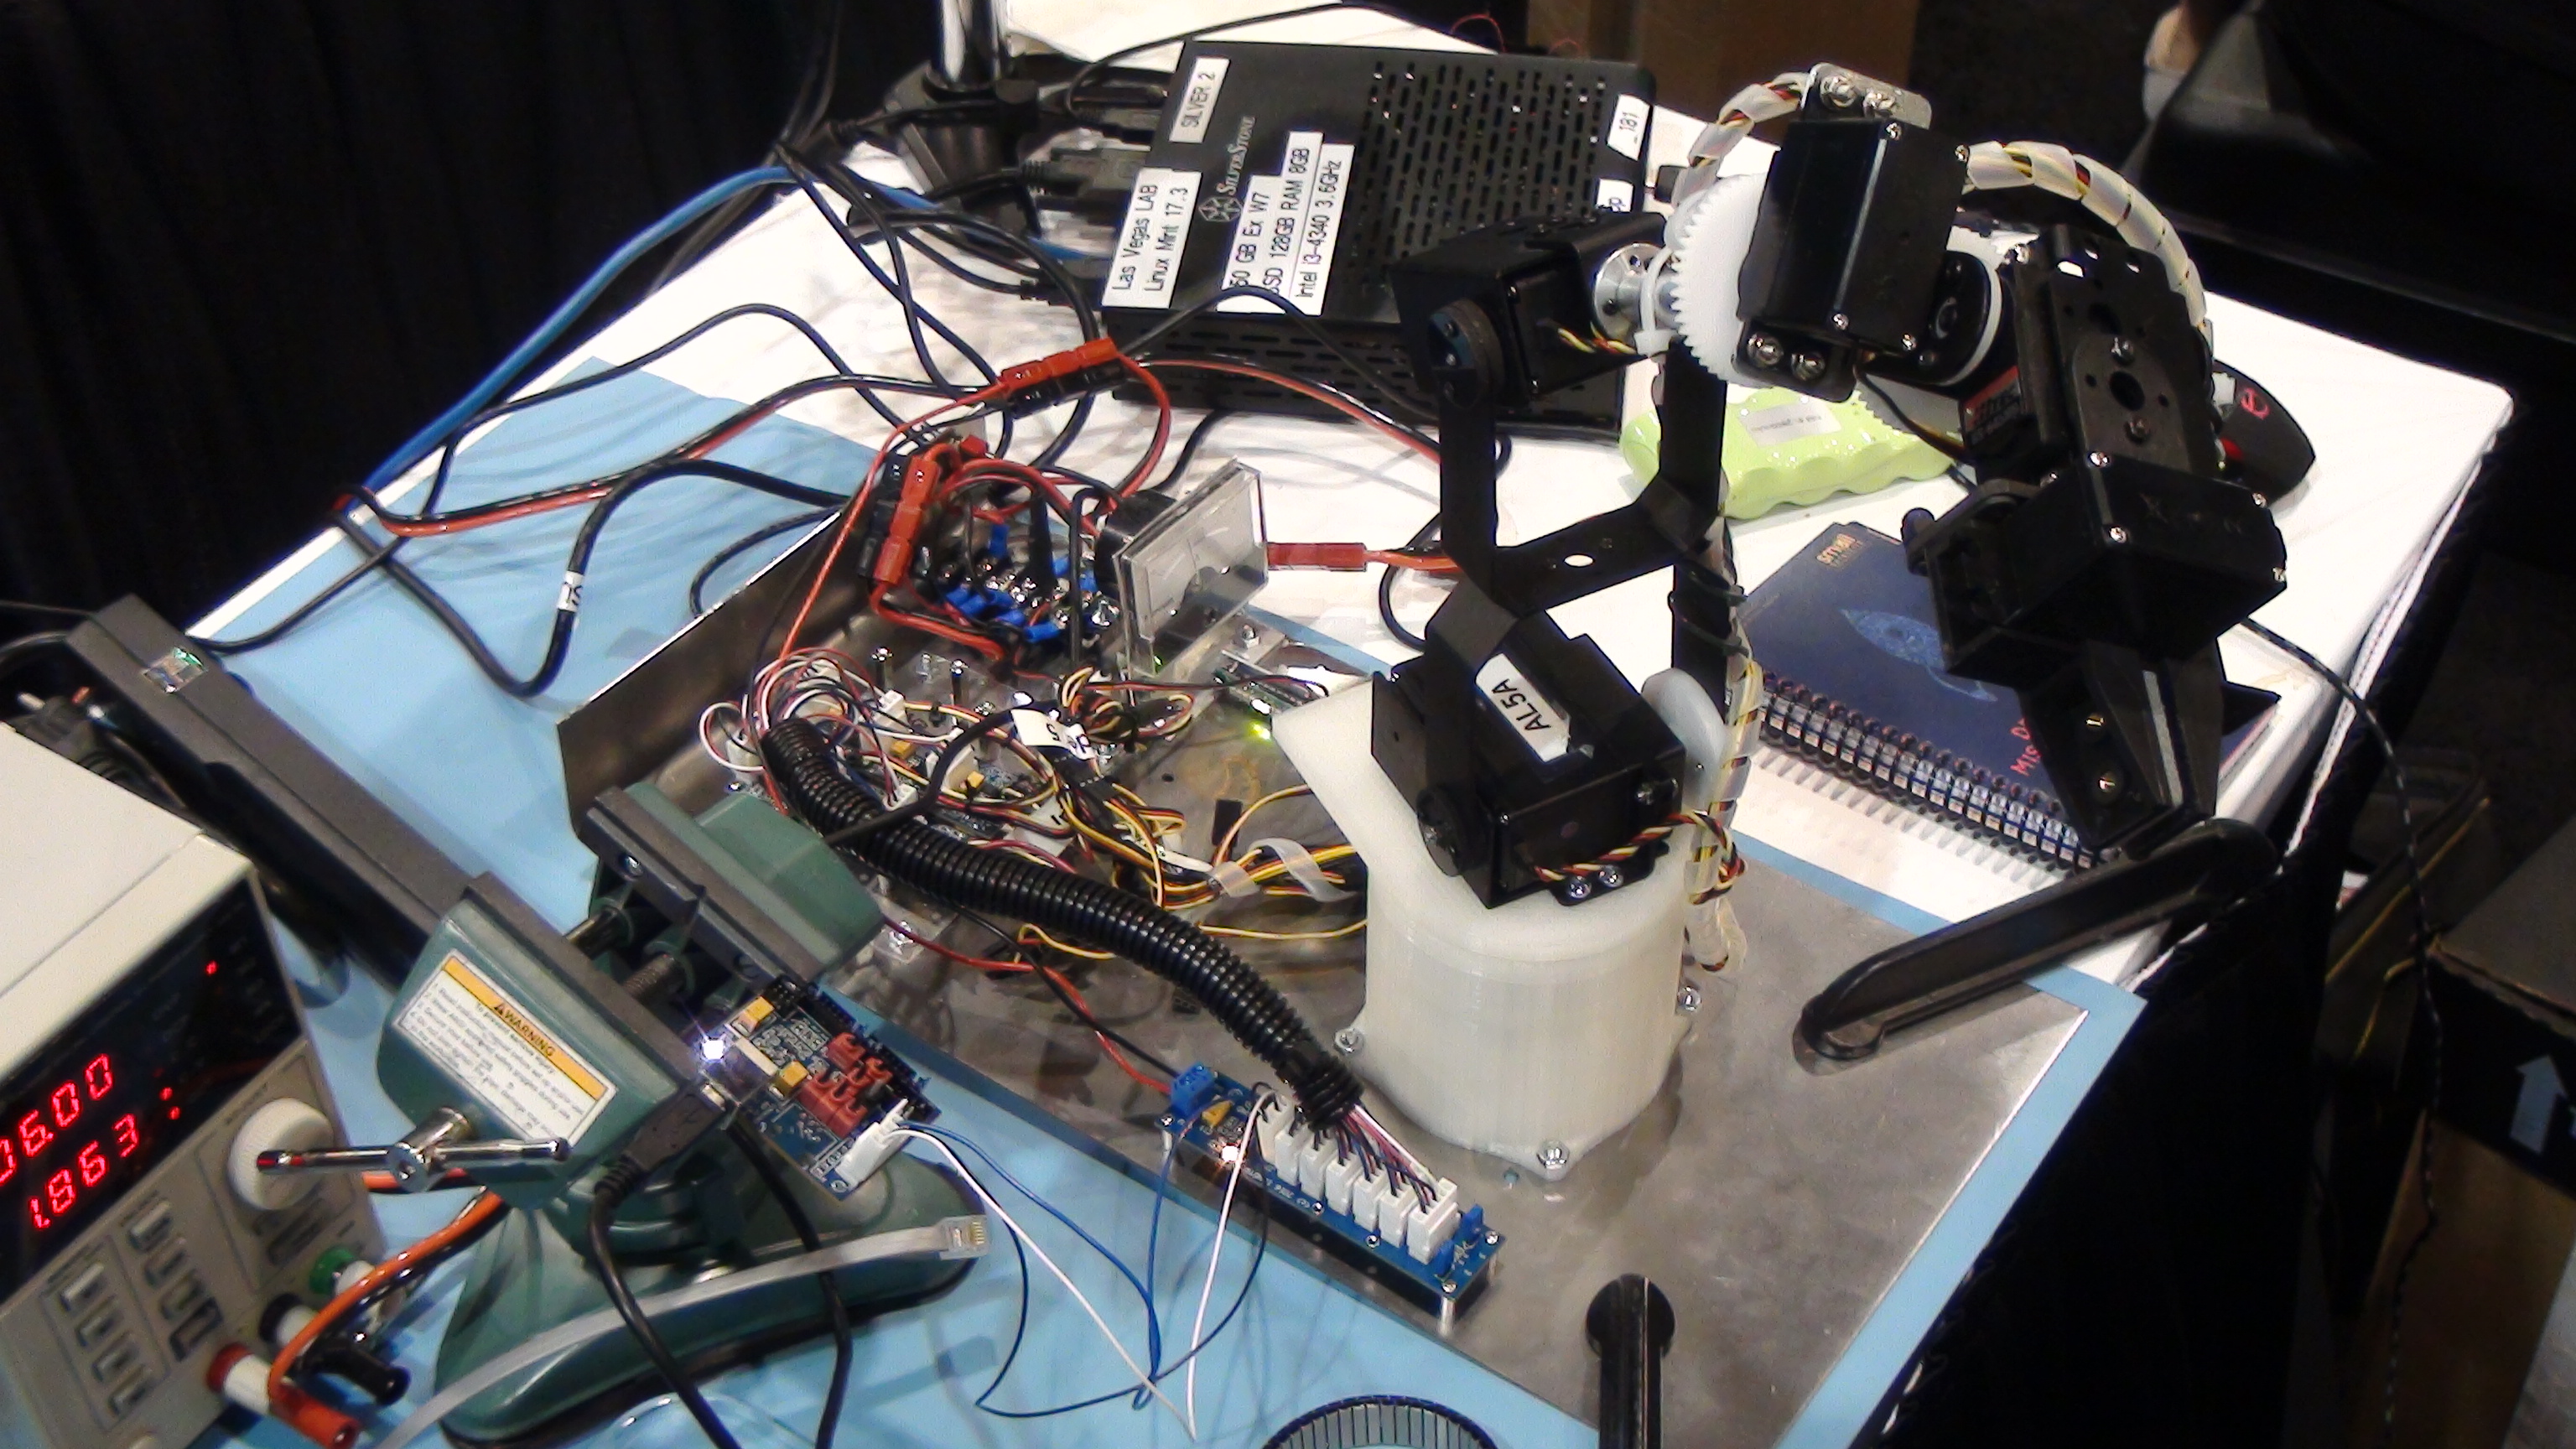
AL5A I2C Servo Based Robotic ARM Control Blue Print
 |
 |
 |
Videos
Item |
Description | Video |
|---|---|---|
1 |
I2C Control AL5A ARM with Java/Pyroraptor |  |
2 |
I2C AL5A Java Serial Control Sequence File Playout | |
3 |
New Base for the ARM | |
4 |
Self Test and Default ARM Position | |
5 |
I2C Servo Control with Current Measurement Java Graphical Interface | |
6 |
Changing the I2C Address of the I2C PWM Slave stored in PIC EEPROM. | |
Introduction
We describe the design and the control of a 6 degree of freedom AL5A Robotic ARM using an I2C Master. Each servo is controlled by an IONOTRONICS MK-44149 I2C Slave PWM Servo Controller (based on the PIC16F1825).
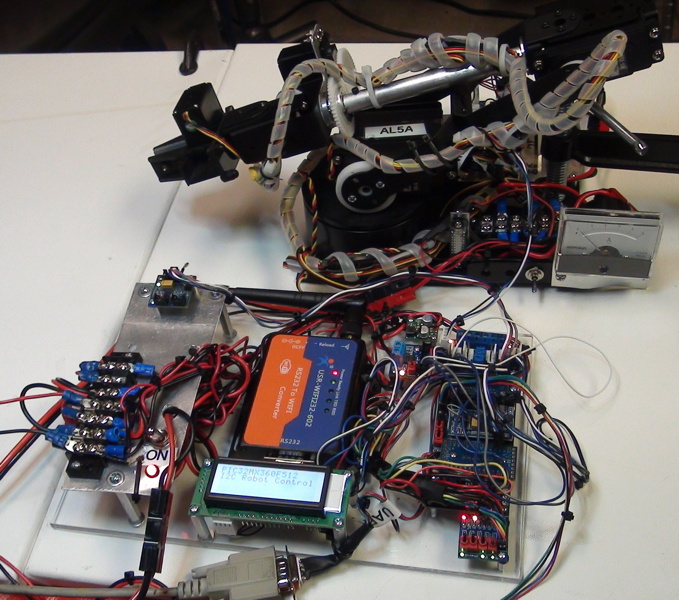
The I2C AL5A can be controlled using the Pyroraptor Java Graphical Interface using the Pyroraptor USB/I2C Bridge. In addition, using the PIC32 and Eoraptor Robotics Plateform, a Java Application can control the AL5A Arm using a serial port. Finaly, the AL5A or any other Robotic ARM can be controlled through a Wireless TCP/IP connection using the JavaRoboticsApp. In this way, any Robotic ARM can be added to an I2C Rover and controlled remotely through Wirless TCP/IP.
Design
Each joint of the AL5A ARM is controlled by an MK-44149 which converts a PWM Servo into an I2C Slave. In addition, the MK-44149 can measure the servo current. See the video. Six joints are controlled. A scan of the I2C bus with the Pyroraptor is shown below with the I2C Address for each joint.
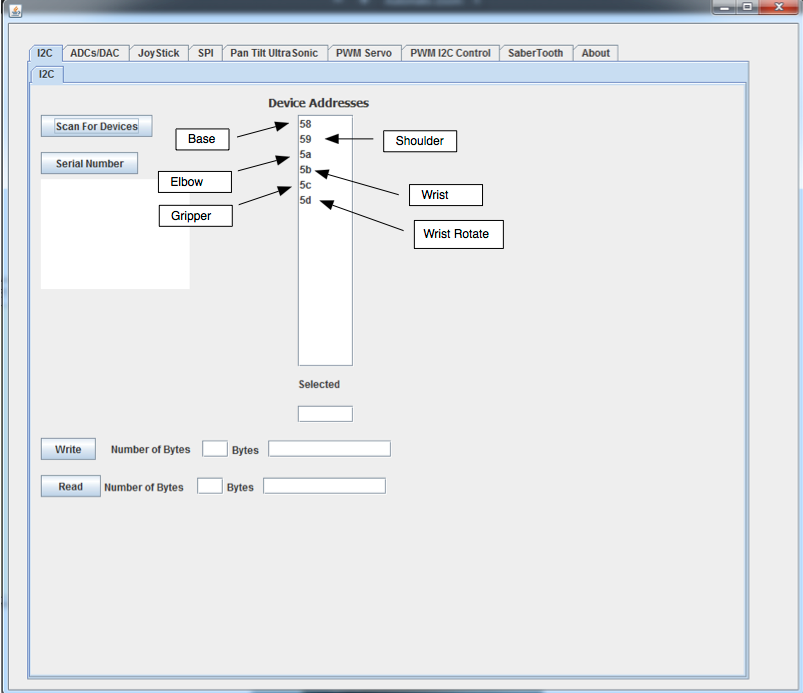
See the video on changing the I2C address for each MK-44149 PIC16F1825 I2C PWM Slave.
The photos below show the Servos and their associated I2C address in Hexadecimal.
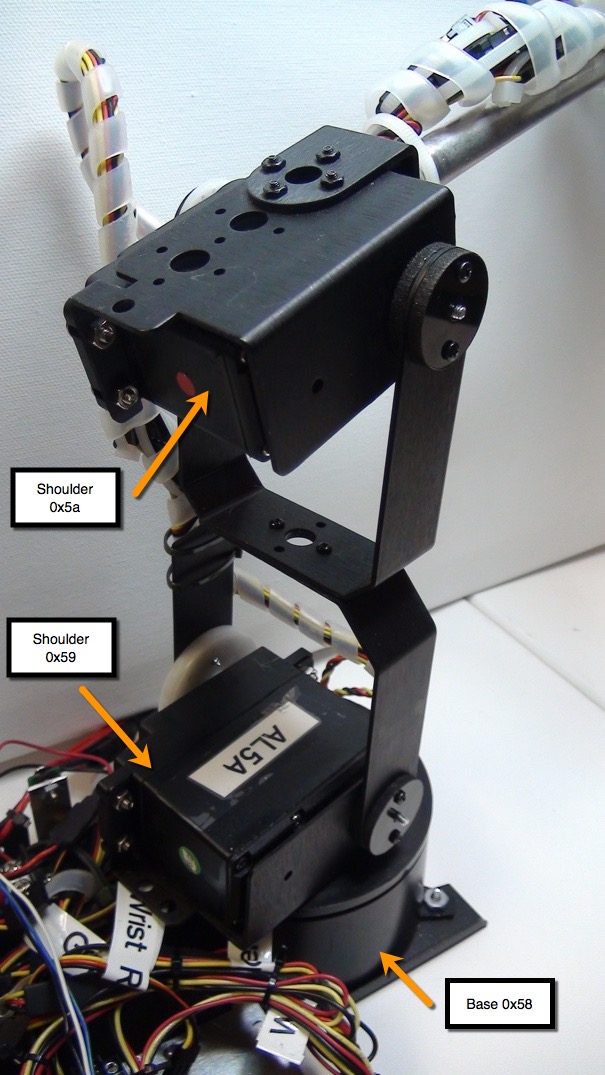
Base, Shoulder and Elbow with I2C Addresses

Wrist Rotate, Wrist and Gripper with I2C Addresses
New Base for the ARM
IONOTRONICS¬ has developed a new base for the ARM to replace the base from Lynxmotion. The IONOTRONICS base provides smooth movement and handles very heavy loads. See the vidoe here. Contact IONOTRONICS for availability and design.

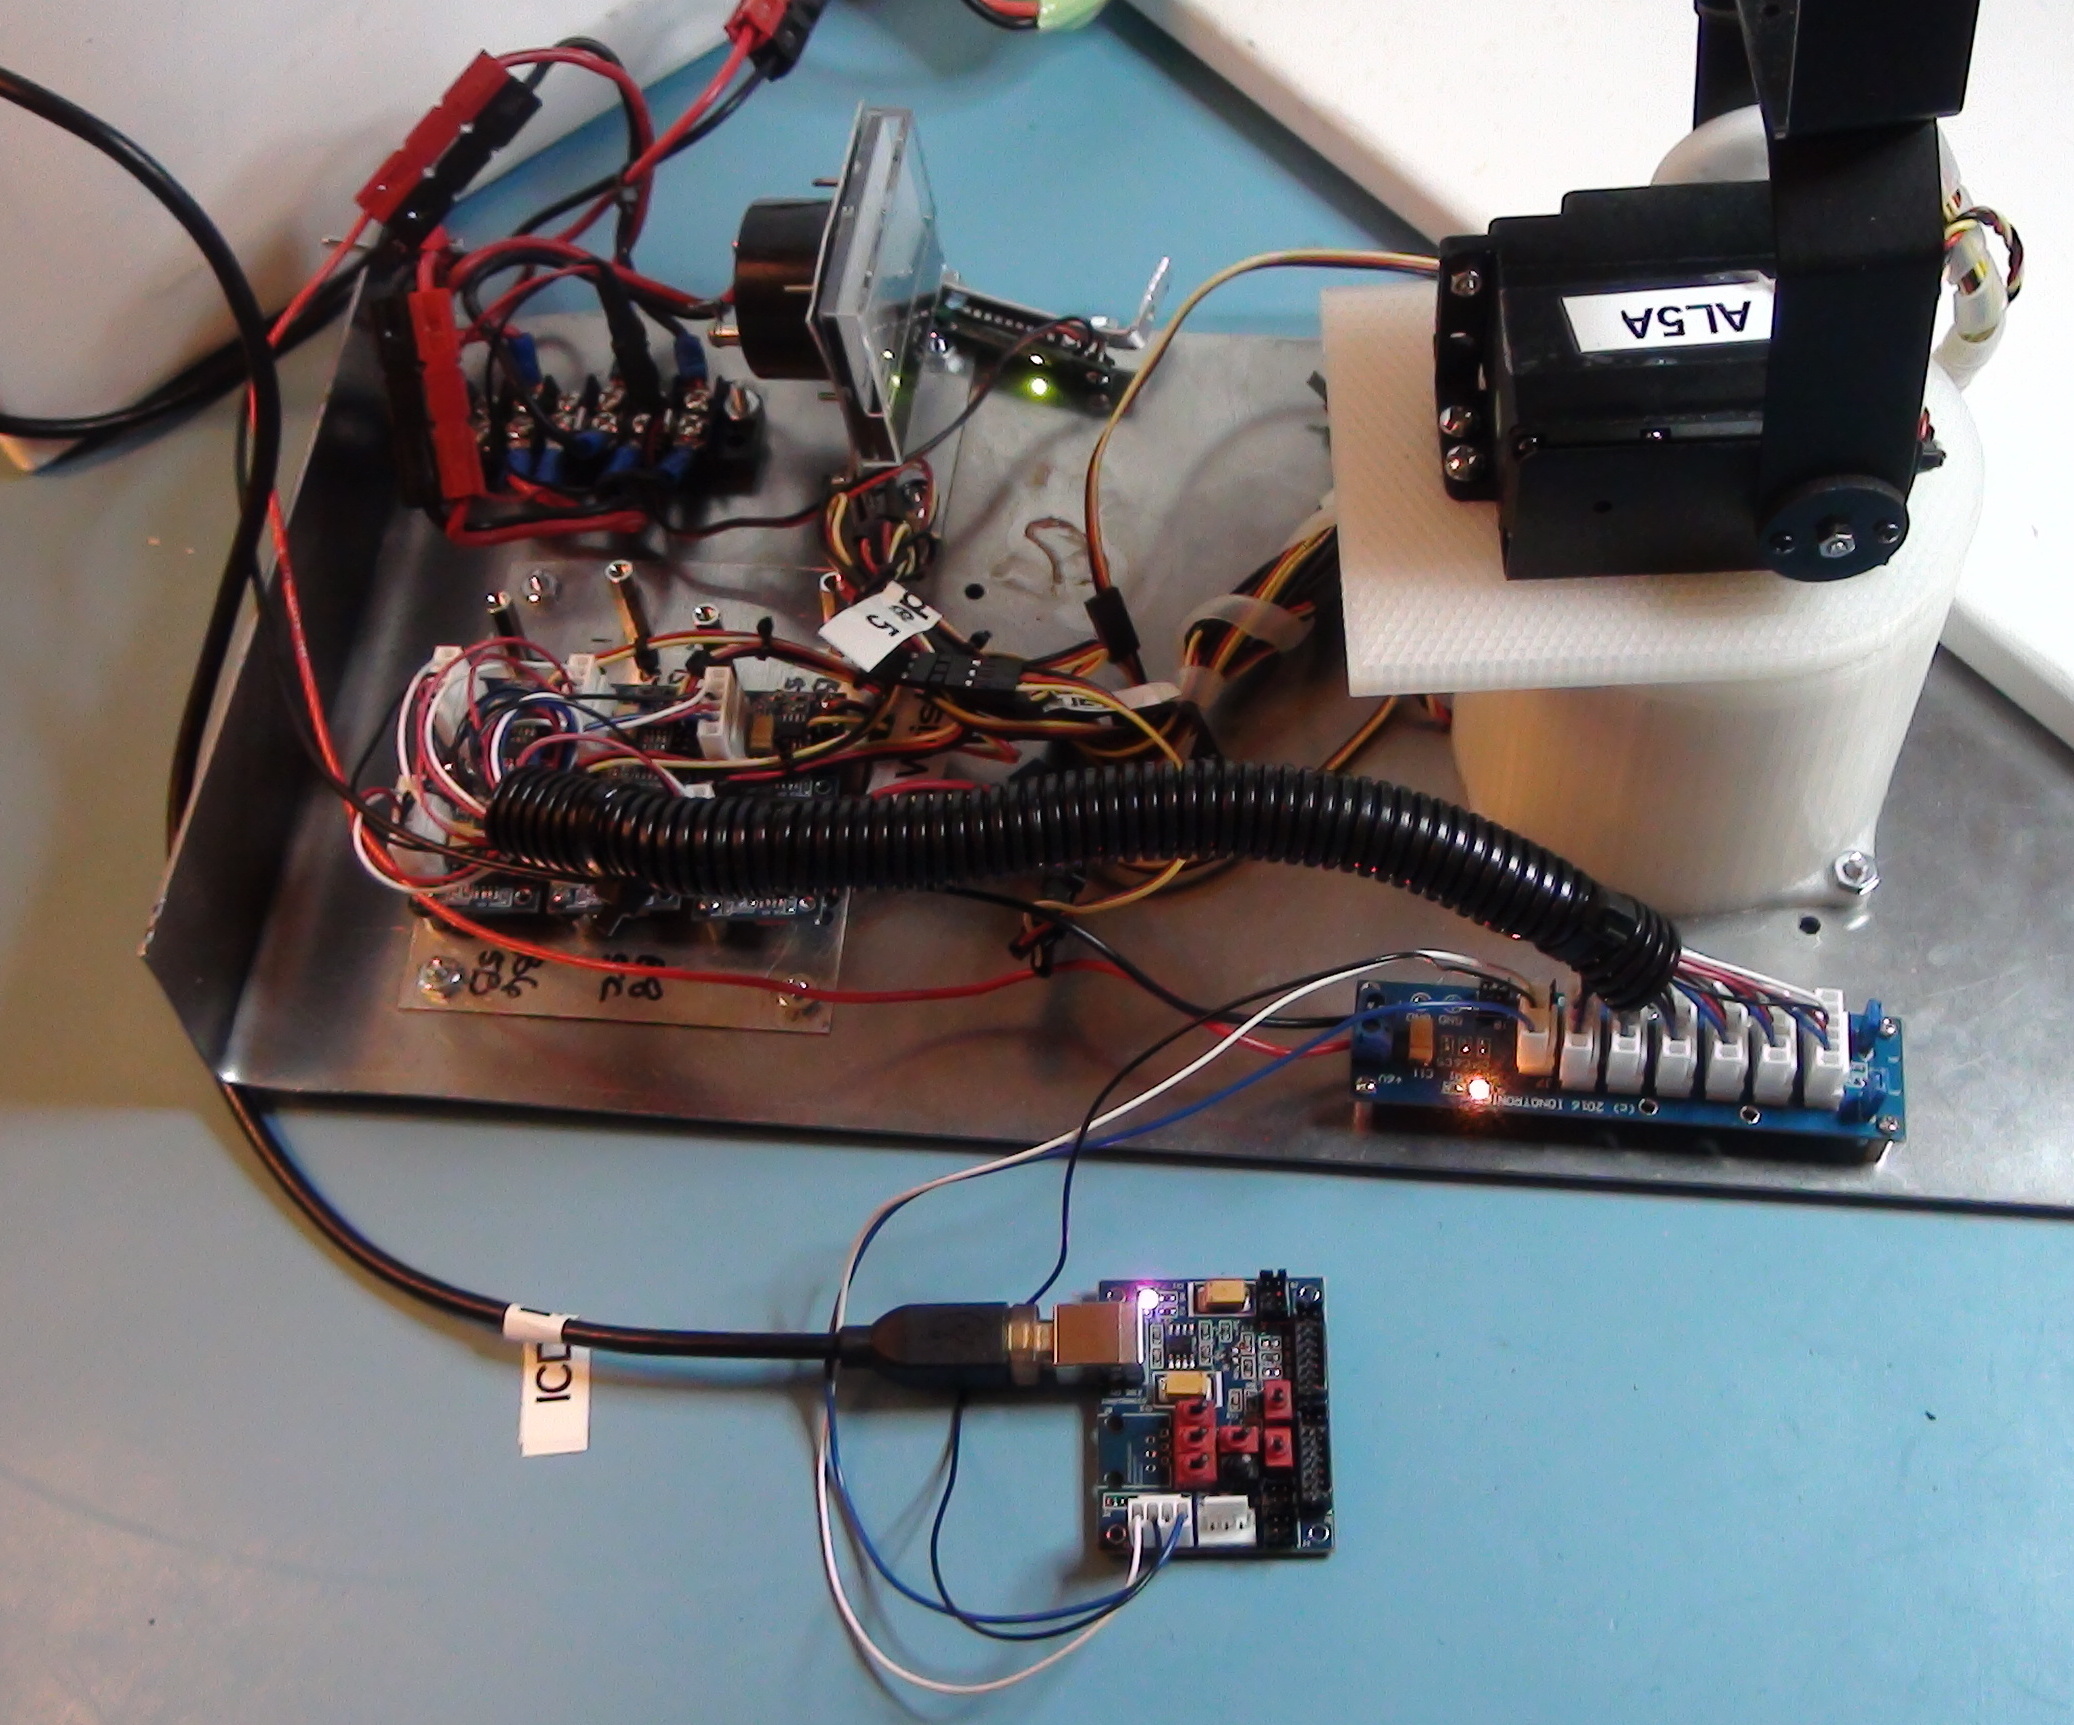
I2C PWM Control
Each joint Servo is controlled through PWM (1500us at 50 Hz). The PWM signal is generated by the MK-44149 I2C Slave PWM Servo Controller (based on the PIC16F1825). In this fashion, the Servo is effectively an I2C Slave device. The Photo below shows six MK-44149 parts mounted on a platform and bused together. Each Servo is connected to each MK-44149 . The MK-44149 provides the 6V supply for the Servo as well as the PWM signal and Ground. Each MK-44149 monitors the current per servo. The current is available through I2C. The PIC16F1825 performs the averaging necessary to get the current. It must be noted that we need the average current when reading the Servo current.
Important Note: When connecting the Pyroraptor USB/I2C Bridge to the I2C Bus, make sure to connect to the 4 pin Molex connector on the MK-66501 6x I2C Bus. The Vdd (5V or 3.3V) on this I2C connector is isolated from 6V.
.
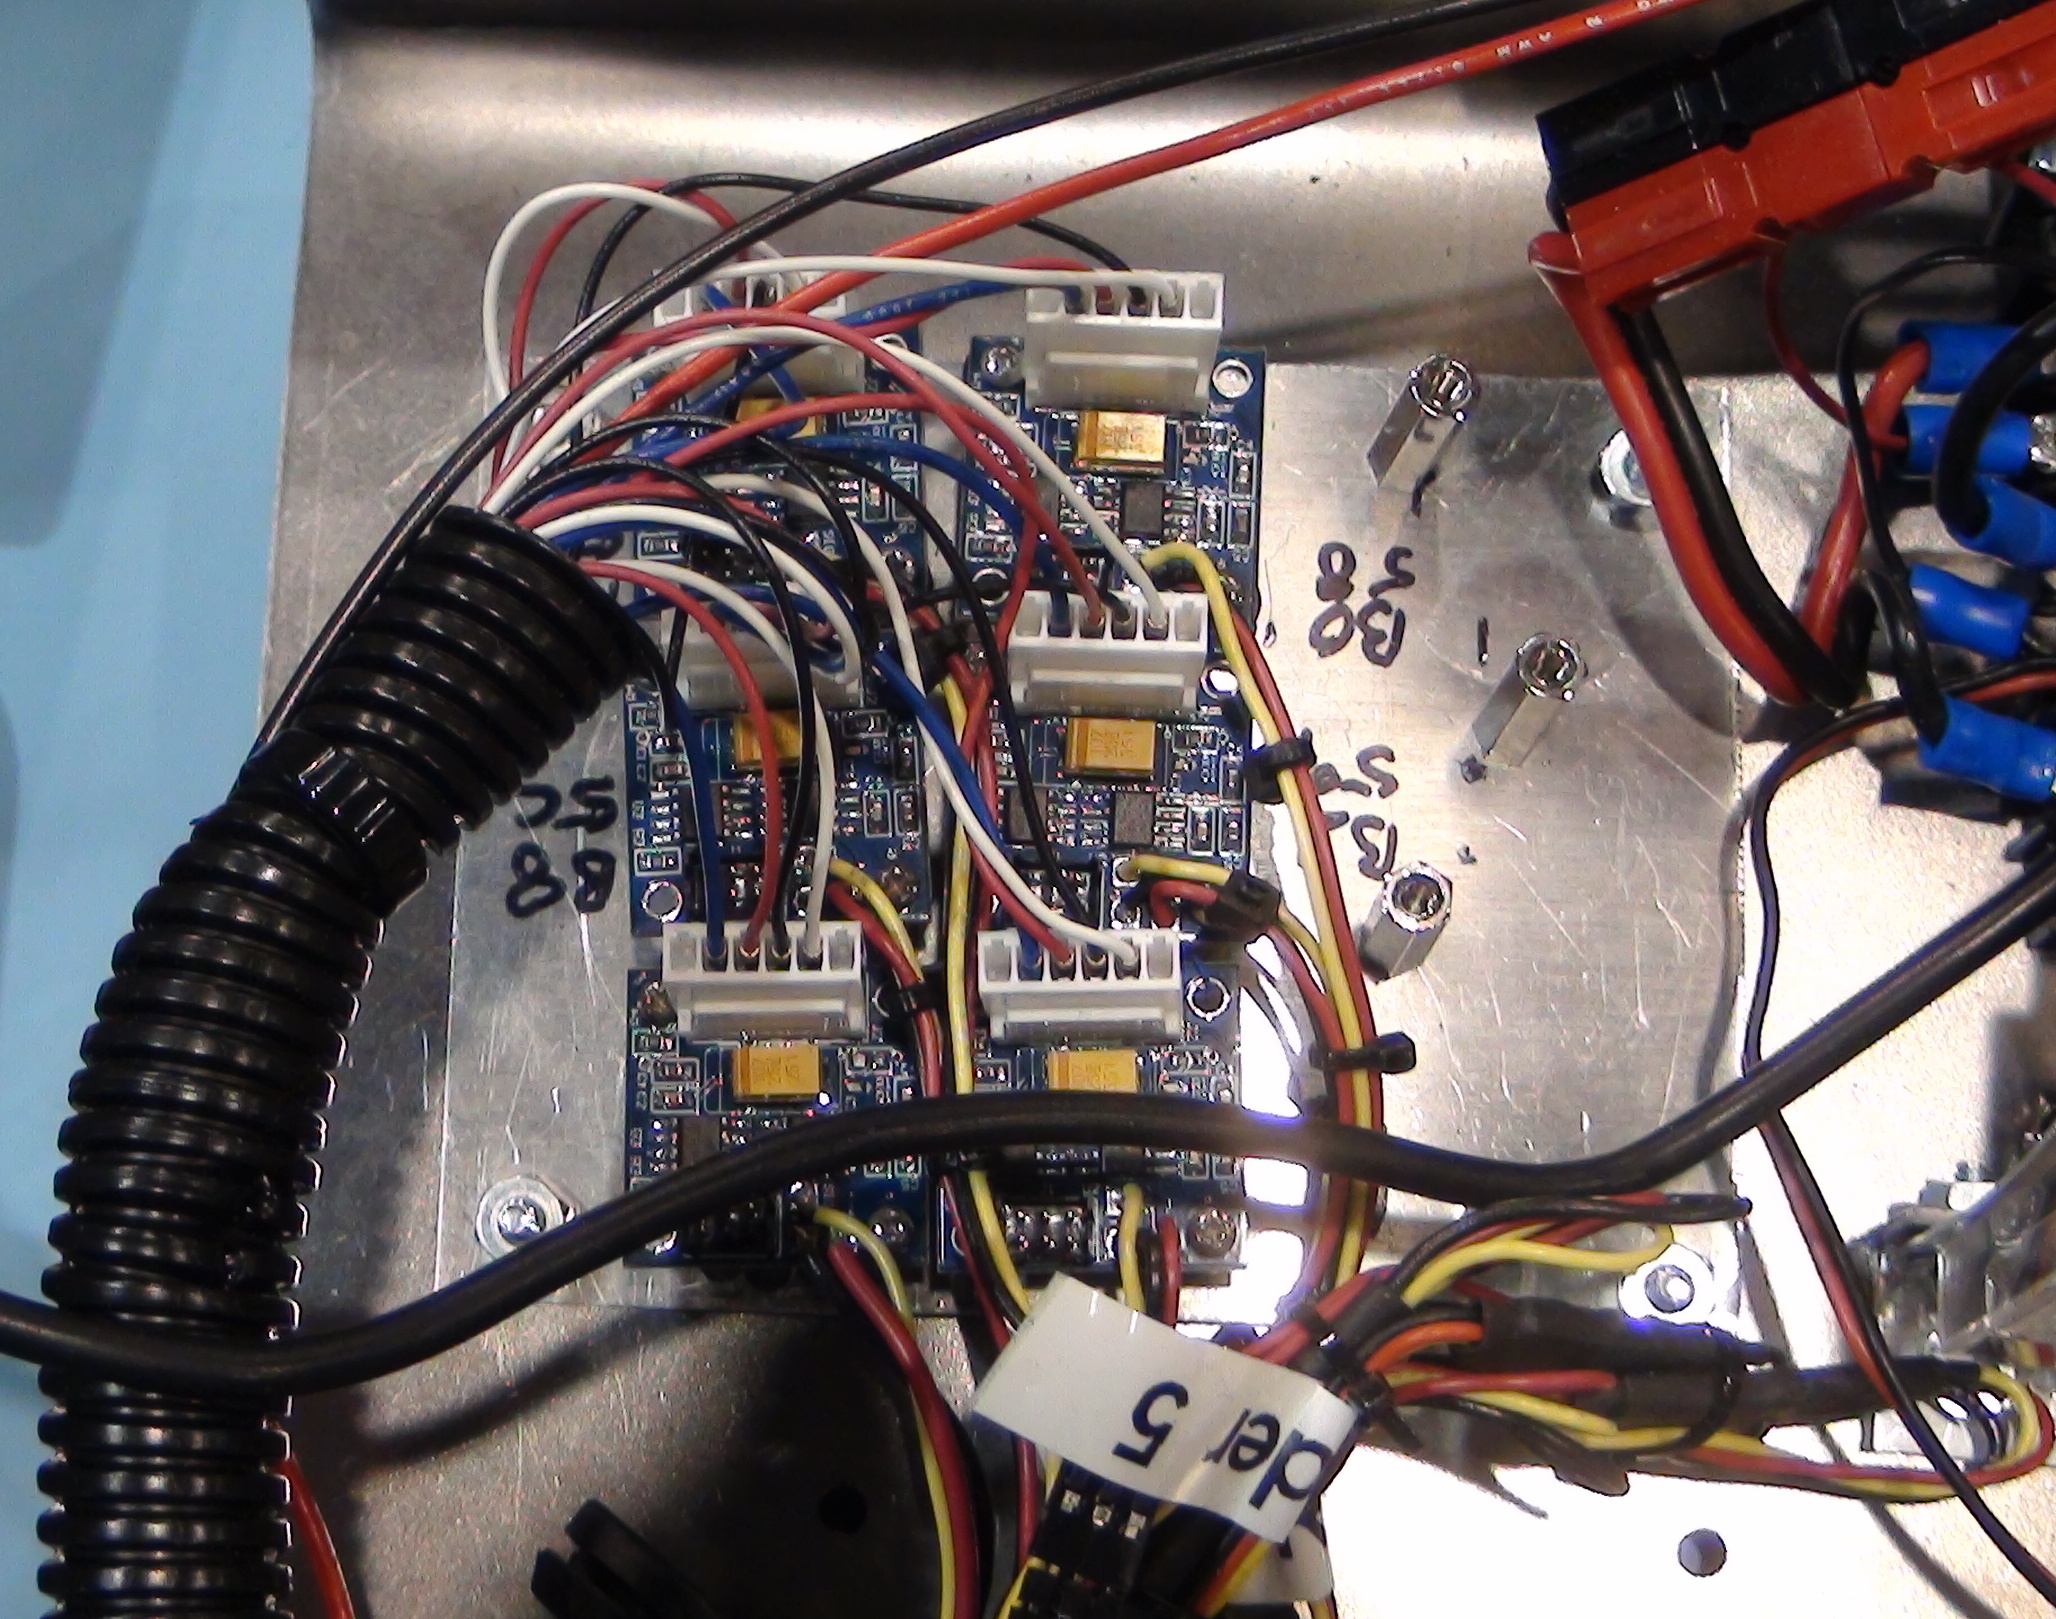
Six MK-44149 I2C to PWM Devices Mounted on Platform and Bused to 6x I2C Bus. Each MK-44149 Controls a Servo.
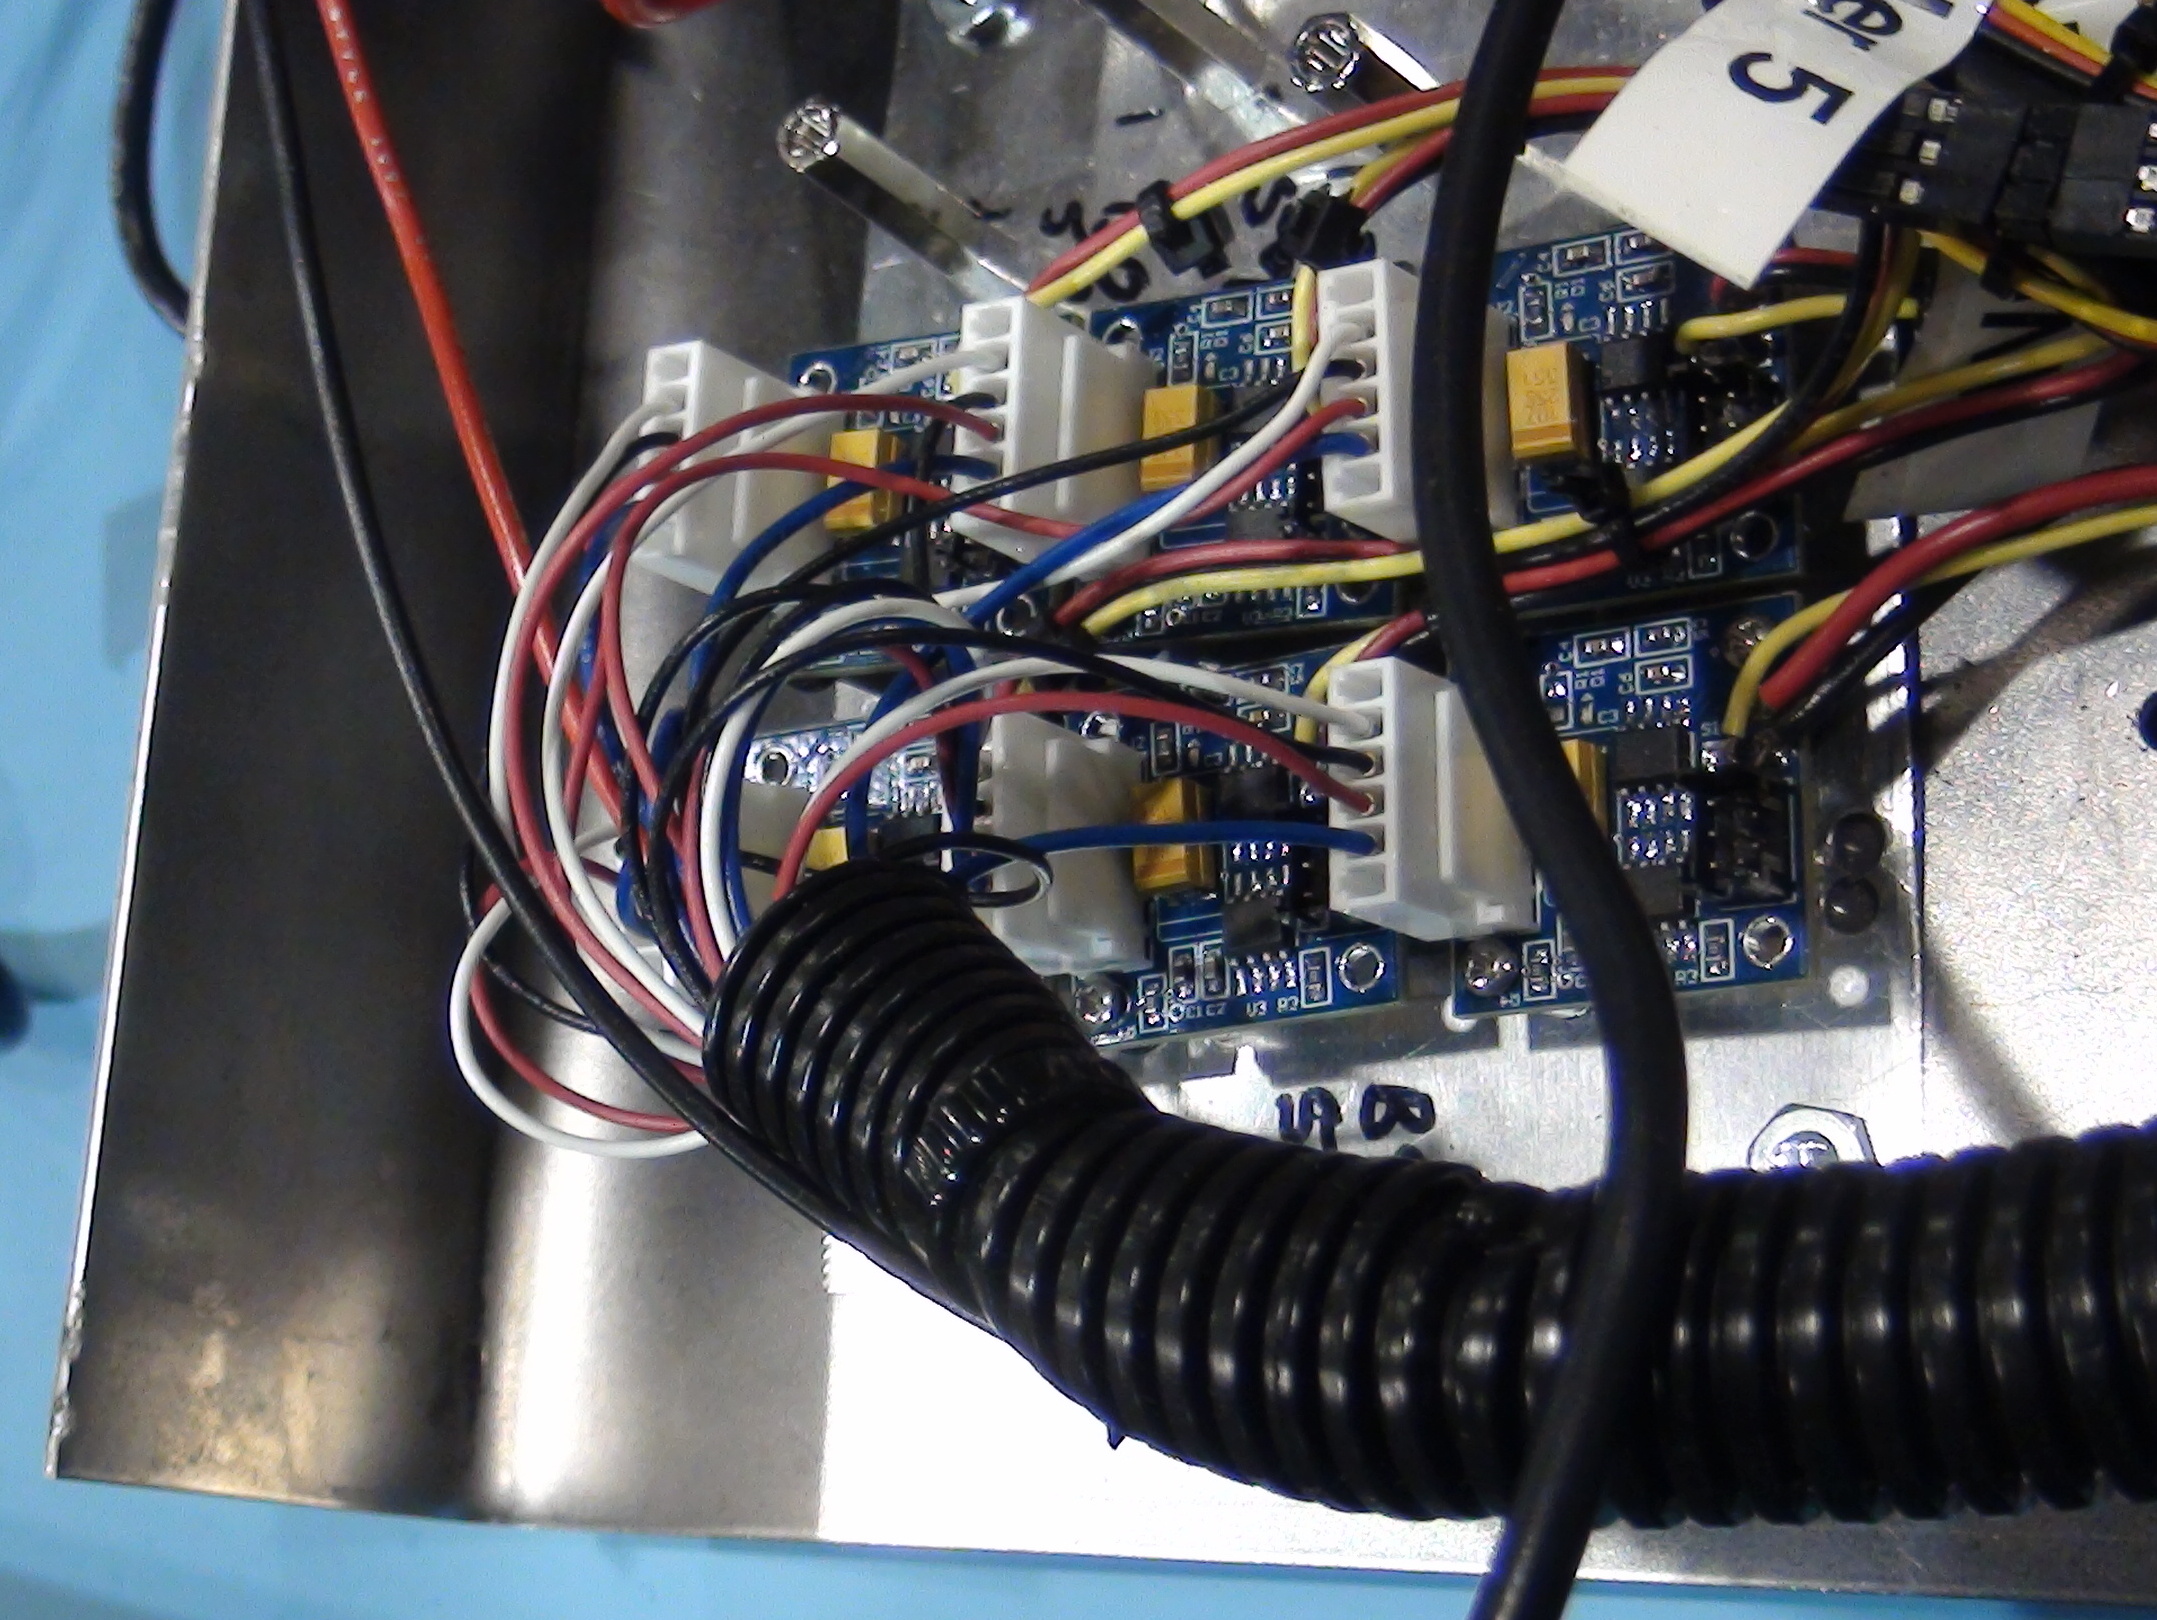
Six MK-44149 I2C to PWM Devices Mounted on Platform and Bused to 6x I2C Bus. Side View

6x I2C Bus by IONOTRONICS ( MK-66501) used to bus six MK-44149 I2C to PWM Devices Mounted on Platform.
AL5A ARM Control with Pyroraptor USB/I2C Bridge
The I2C based AL5A Robotic ARM can be controlled with the Pyroraptor USB/I2C bridge. To facilitate testing of the AL5A ARM, we have developed a TAB in the Pyroraptor Java Graphical Interface. Using this TAB each joint can be controlled (position and time duration to move to the position). A TAB is also provided to control indvidual servos.
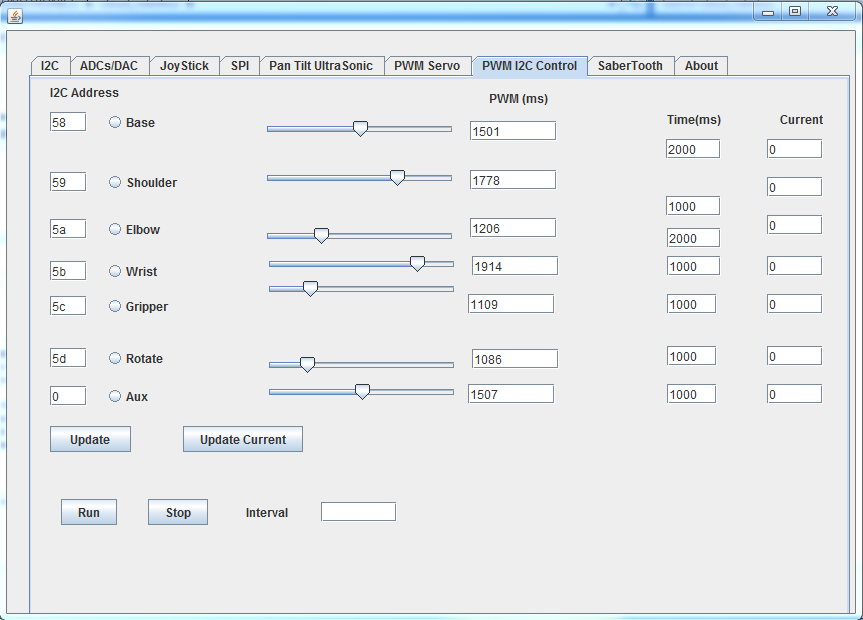
Pyroraptor Java Application TAB for Control of the I2C Based AL5A
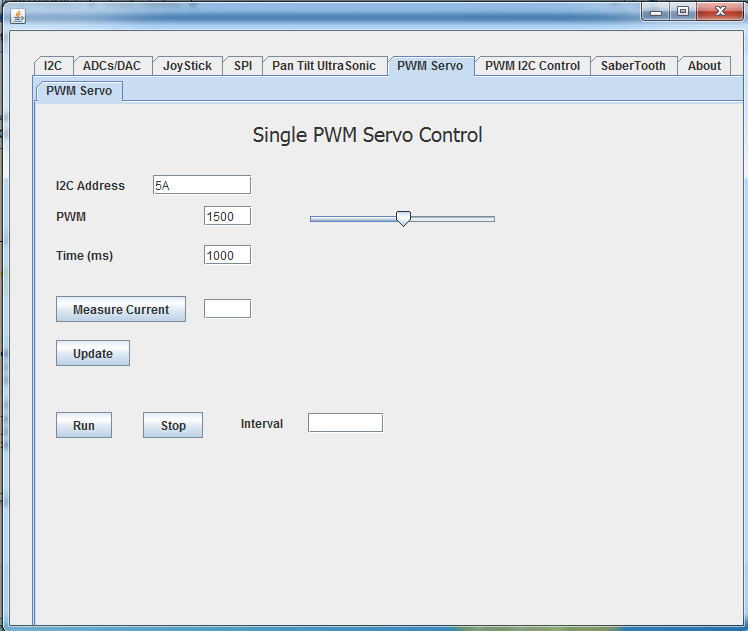
Pyroraptor Java Application TAB for Individual I2C Servo Control
Important: When connecting to the Pyroraptor DO NOT connect the I2C power. Only the Clock, Data and Ground. Use the special 4 pin Molex connector or 4 pin DF-11 connector on the MK-66501 which is conveniently provided.
AL5A ARM Control with Serial Port Using Eoraptor Robot Platform and SoC Adaptor
In many applications local control of Robotic Arms through a serial port is desired. In this case, we use a 32 bit PIC or an 8 bit PIC as the I2C Master controlling the I2C based AL5A arm. The PICs also support a dedicated serial port through an on-chip UART core. In both cases the PIC System on a Chips (SoC) have a dedicated I2C core on-chip. In the case of the 32 bit PIC two I2C cores are supported. The 8 bit PIC is based on the PIC16F1947. The PICs can be programmed with the Remote Robot Control Program (RRCP). With RRCP, a command is provided to control multiple I2C based PWM servos. Through the serial port, this ASCII command can be sent and it can cause multiple or a single servo to update its postion over a defined time duration. By sending multiple sequences, complex ARM movements can be played out. For example, a repetitive pick and place movement. Or sequences for following a certain path. See video  .
.
Note the 32 bit PIC and 8 bit PIC RISC System on a Chips are preprogrammed by IONOTRONICS with the RRCP firmware. So no programming is required.
Important: When connecting to the Eoraptor I2C connector, DO NOT connect the I2C power. Only the Clock, Data and Ground. Use the 4 pin Molex or DF-11 connector provided on the MK-66501 6x I2C Bus.
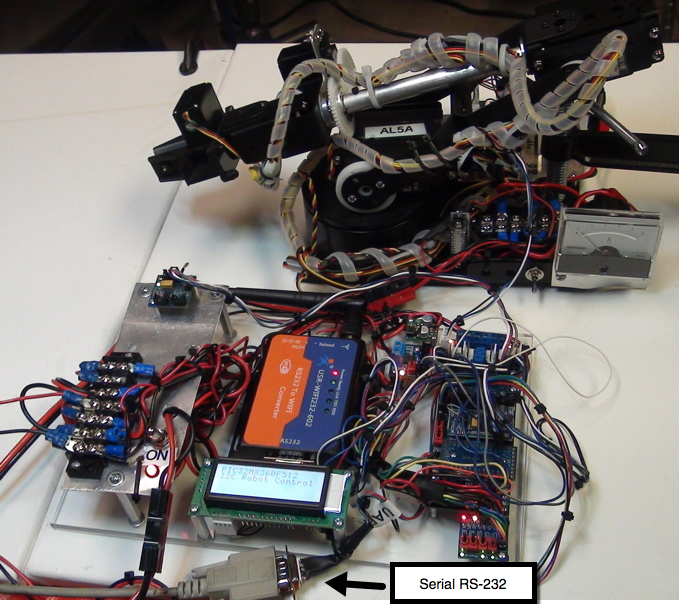
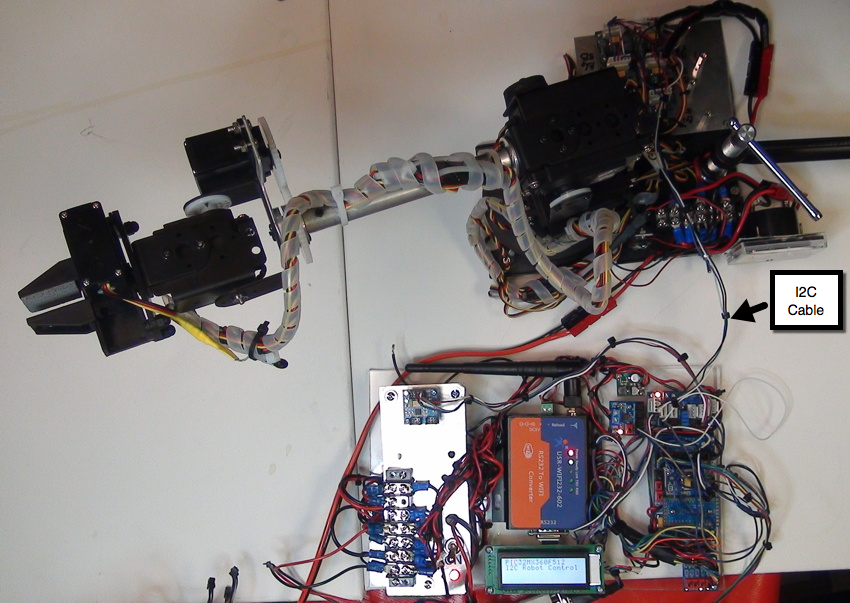
IONOTRONICS has developed a Java Program that incorporates an open source Java serial port library so that an ASCII sequence file can be played out for the Robotic ARM with I2C PWM Servos. The program runs on Linux, MAC OS SX and Windows. The Java program can form the basis for a complete Robot control progarm using the serial port in combination with the PIC SoC and Eoraptor Robot Control Platform. Below is a sequence of movements that are played out by the I2C based AL5A robotic ARM in this video .
@ p58 2000 p59 1500 p5a 900 p5b 1500 p5c 900 T5000
@ p59 1300 T2000
@ p59 1000 T2000
@ p58 1500 p59 1100 p5a 1200 p5b 1500 p5c 900 T5000
@ p5b 900 p5c 900 T1000
@ p5b 1100 p5c 900 T2000
@ p5d 800 T2000
@ p5d 2000 T1000
@ p5d 800 T2000
@ p5d 1500 T1000
@ p5c 900 T2000
@ p5c 1800 T5000
@ p5c 900 T1000
@ p58 2000 p59 1500 p5a 900 p5b 1500 p5c 900 T5000
See the RRCP for description of the syntax.
The Pyroraptor USB/I2C Bridge Java Graphical Interface provides the capability to read the sequence file and and send the sequences to the I2C ARM.
Here is what you need to make this happen (in addition to the I2C AL5A Build ).
Item |
Description | Part | Notes | |
|---|---|---|---|---|
1 |
32 bit PIC SoC | MK-33856 | The PIC has an on chip I2C core (used as Master) as well as an on chip UART core. | |
2 |
Eoraptor Robot Control Platform | MK-36019 | The PIC is mated to the platform. The platform provides RS-232 level translation and an I2C connector which the I2C AL5A I2C cable connect to. The serial port is attached to the Linux (or Windows or MAC ) workstation. The I2C connector is a 4 pin Hirose DF-11 series. | |
3 |
Hirose 4 pin to DB9 Female RS-232 Connection Cable | See here for the Cable. | ||
4 |
6V to 3.3V LDO with 4xI2C 4 Pin Connectors | MK-14308 | Wire up to 6V or 12V DC Adaptor. Provides 3.3V for the Eoraptor. Also more I2C bus connectors. |
AL5A ARM Control with Wireless TCP/IP Using Eoraptor Robot Platform and SoC and WiFi Adaptors with JavaRoboticsApp
You can build an ARM or multiple ARMs on a Robotic platform and control the arm through wireless. For example, you can attach the ARM or two ARMs to a Rover and control the ARMs as well as the Rover. The Rover Blue Print implements all you need. Just attach the I2C based Robot ARM to the Rover and plug it into the I2C bus. The Euroraptor Platform and the WiFI Adaptor provide Wireless TCP/IP. You can test through telnet or using a Java or Python Application for example.
Building the AL5A I2C Based Robotic ARM |
 |
The I2C AL5A can be built using the parts and suggestions in the Table below.
To build the I2C Rover you will need:
| Item | Description | Part Number | Notes | |
|---|---|---|---|---|
| 1 | AL5A with no Electronics from Lynxmotion | AL5A Arm no Electronics | No Electronics. | |
| 2 | Wrist Rotate Upgrade (Heavy Duty) | Wrist Rotate Upgrade (Heavy Duty) | Great Option | |
| 3 | 6x I2C Based PWM Servo Controller with Servo Current Measurement | MK-44149 | Six I2C PWM Circuits that conver the Servos to I2C Slaves. Six degrees of freedom. | |
| 4 | 6x I2C Molex 6 Pin Bus | MK-66501 | Used to Bus the MK-44149 together. Provides six pairs of female to female Molex connectors and a Printed Circuit Board with 6 Molex male connectors. The PCB supports 6V DC input terminal and a Molex or 4 pin DF-11 Series Hirose connector for connecting the I2C bus to the Pyroraptor or Eoraptor. | |
| 5 | PowerPole Wires, Connectors and Fuses plus Wires (Black and Red 14 Gauge) | Anderson Powerpole Connectors | Use 15 Amp Red/Black Powerpole Connectors, Retention Clips etc. to connect 6V DC Power. | |
| 6 | 6.0 Volt Ni-MH 2800mAh Battery Pack | Lynxmotion (Robot Shop) | This battery provides the current surge necessary for ARM movements. Use for development. Eliminate problems. Make sure to use a Powerpole connector instead of the supplied connector. Replace (carefully). | |
| 7 | 6VDC Adaptor Input 100-240VAC, 50-60 Hz. 4 Amp @ 6VDC | WSU060-4000 | This is a great 6V 4Amp DC adaptor with enough juice to power the AL5A. Recommend building a 2.1mm to PowerPole adaptor for rugged connection to the Al5A I2C Robot. | |
| 8 | Analog CURRENT PANEL METER 5A DC / 70 X 60MM | AIM705000 | 5 Amp DC From Jameco. Put in series with the 6V Power Supply. Always monitor the current. | |
| 9 | DC On/Off Switch | Many choices. Heavy duty. |
We recommend that you use a thick Plexiglas platform to mount the six MK-44149. Use 2-56 spacers.
In addition to the above you will need:
| Item | Description | Part | Notes | |
| 1 | This is the 2-56 screw used to attach the PCB to spacer | Machine Screw Pan Phillips 2-56 | Top Side of Plexiglas PCB to Spacer | |
| 2 | The 3/8" #2-56 Standoff | Round Standoff Threaded #2-56 Aluminum 0.375" (9.53mm) 3/8" | Spacer | |
| 3 | This is the 2-56 screw used to attach the spacer to the plexiglas side (under) | Machine Screw Pan Phillips 2-56 | Attach Spacer to Plexiglas (Screw From Under Side) | |
